Fitwaffle’s Baked In One, is Head’s second cookbook. Her first, Fitwaffle’s Baking it Easy was a Sunday Times bestseller for six weeks in the United Kingdom.
Head is a personal trainer turned food influencer, turned baker and is an advocate of being able to enjoy the foods you love, while staying healthy.\

"Long story short, I learned that all foods are OK in moderation. This meant a little bit of dessert when I wanted [even daily] was not going to hurt."
She now works fulltime on Fitwaffle (the name comes from her love of food and fitness) creating recipes.
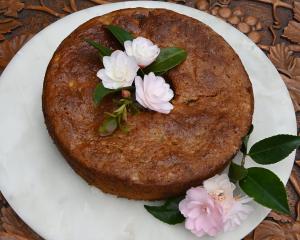
According to her website, Head loves anything cinnamon or with a lot of icing such as her cinnamon apple cake or carrot cake with cream cheese icing.
"As I’m sure you’ve noticed I have a very sweet tooth, I don’t think I’ve ever said the words ‘That’s too sweet’."
In the new book all recipes are made in the one tin — so this is how she advises lining a square tin.
"Grab 2 baking tins of the same size. Rip off a piece of baking paper that overhangs your tin by about 3-4 inches [7.5-10cm] all the way around. Place it over one of the tins, then place the other tin over the baking paper and press it down into the bottom tin. Fold the edges of the baking paper around the edge of the bottom tin, making sharp creases — this is what’s going to hold the paper in place. Remove the top tin to reveal your beautifully lined tin. Ta da!"
The book
These recipes are extracted from Fitwaffle’s Baked In One by Eloise Head (Ebury Press, $50) Photography by Faith Mason

Speculoos cheesecake bars
This is one of my most popular recipes on social media and it is definitely one of my favourites. It is absolutely bursting with caramelised biscuit flavours. It has a buttery speculoos biscuit base and a creamy speculoos cheesecake filling, and is topped with a smooth and glossy speculoos topping and decorated with crushed biscuits, with a biscuit in the middle to finish. Super delicious, quick and easy to make, and no baking involved.
Makes 16
Time 20 minutes + 4 hours chilling
For the base
200g speculoos biscuits (I use Biscoff)
100g unsalted butter, melted
For the filling
500g full-fat cream cheese, at room temperature
100g (generous ¾ cup) icing sugar, sifted
150g (⅔ cup) speculoos spread/cookie butter (I use Biscoff), melted
For the topping
200g (generous ¾ cup) speculoos spread/cookie butter (I use Biscoff), melted
2 speculoos biscuits (I use Biscoff), finely crushed + 1 whole biscuit

Method
For the base
Line a 20cm square baking tin with non-stick baking paper.
Put the biscuits into a food processor and process until finely crushed. Alternatively, put them into a plastic bag and crush with a rolling pin. Tip into a medium mixing bowl, then pour in the melted butter and mix with a spoon until fully combined. Press the mixture firmly into the bottom of your prepared tin with the back of a spoon, then pop into the refrigerator while you make the filling.
For the filling
In a large mixing bowl, beat together the cream cheese, icing (powdered) sugar and speculoos spread (cookie butter) with an electric hand mixer until smooth.
Remove the chilled base from the refrigerator, then spoon on the filling, smoothing it out to the edges.
For the topping
Pour the melted speculoos spread over the cheesecake and smooth it out quickly but gently with the back of a metal spoon or spatula. Sprinkle the crushed speculoos biscuits around the edge of the cheesecake to form a border. Then place the whole biscuit in the middle.
Chill in the refrigerator for at least four hours, or overnight, until completely set. Cut into 16 squares and enjoy!
Store in the refrigerator for up to three days.

Cookies and Cream Stuffed Brownies
A rich and fudgy brownie, packed with white chocolate chips with a layer of whole cookies and cream biscuits through the middle. There’s a cookie per slice and cookie pieces on top, so you will always get a bite that is bursting with different flavours and textures! Absolutely delicious.
Makes 16
Time 1 hour + overnight chilling
170g (6oz) unsalted butter, melted and cooled slightly
100g (½ cup) light-brown sugar
150g (¾ cup) caster (superfine) sugar
2 large eggs
125g dark chocolate (at least 50% cocoa), broken into pieces, melted and cooled
100g (¾ cup) plain (all-purpose) flour
30g (4 Tbsp) cocoa powder
1 tsp salt
200g (scant 1 cup) white chocolate chips
22 cookies and cream biscuits (I use Oreos), 16 whole + 6 broken into small pieces for the topping
Method
1. Preheat the oven to 190degC (170degC fan) and line a 20cm square baking tin with non-stick baking paper.
2. Put the melted butter and both sugars into a large mixing bowl and beat together with an electric hand mixer for about 2–3 minutes until fully combined and no lumps remain. Add the eggs and continue to beat until thick and fluffy (this could take from a few minutes up to 15 minutes, depending on the temperature of the ingredients and your equipment). Mix in the melted chocolate until just combined.
3. Sift in the flour, cocoa powder and salt, then gently fold in with a wooden spoon or rubber spatula until no streaks of flour remain. Fold in the white chocolate chips until evenly distributed.
4. Transfer half the batter into your prepared tin and smooth it out to the edges. Place the 16 biscuits in lines across the batter. There will be one biscuit per square.
5. Scoop the remaining brownie batter on top of the biscuits, smoothing it out gently. Sprinkle the broken biscuits evenly over the top of the batter.
6. Bake for 25–30 minutes until the edges are cracked and the middle no longer wobbles. Leave to cool completely in the tin, then chill in the refrigerator overnight for best results. Cut into 16 squares and enjoy!
7. Store in an airtight container at room temperature or in the refrigerator for up to 5 days.

School cake
Who remembers this cake from school? Often served with custard – yum! This gives me so much nostalgia. There’s just something about a super soft and light sponge cake with a sweet and simple glaze, topped with lots and lots of sprinkles. It tastes amazing and it is so quick and easy to make. Always a crowd-pleaser and a fun one to make.
Makes16 pieces
Time 50 minutes + cooking
For the cake
170g margarine, at room temperature
170g (generous ¾ cup) caster (superfine) sugar
170g (1 ⅓ cups) self-raising flour
3 large eggs, at room temperature, lightly beaten
1 tsp vanilla extract
For the glaze
170g (scant 1 ½ cups) icing sugar, sifted
2–3 Tbsp boiling water (or warm milk)
About 4 Tbsp sprinkles
For the cake
1. Preheat the oven to 170degC (150degC fan) and line a 20cm square baking tin with non-stick baking paper.
2. In a large mixing bowl, using an electric hand mixer, beat together the margarine and sugar until light and fluffy.
3. Beat in the flour, eggs and vanilla extract until just combined. Try not to overmix, as this can knock the air out and create a dense cake, rather than a light and fluffy one.
4. Scoop the batter into your prepared tin and smooth it out evenly.
5. Bake for 30–40 minutes until the top is lightly golden and a toothpick inserted into the middle comes out clean. Leave the cake to cool for 20 minutes in the tin. Transfer to a wire rack to cool completely before making the glaze.
For the glaze
6. In a small/medium mixing bowl, mix together the sifted icing (powdered) sugar and boiling water until thick and smooth. If it’s too runny, add more icing sugar until you reach your desired consistency.
7. Pour the glaze over the cake and smooth it out evenly. Top with sprinkles and leave to set at room temperature before serving. Cut into 16 squares and enjoy!
8. Store in an airtight container at room temperature for up to four days.