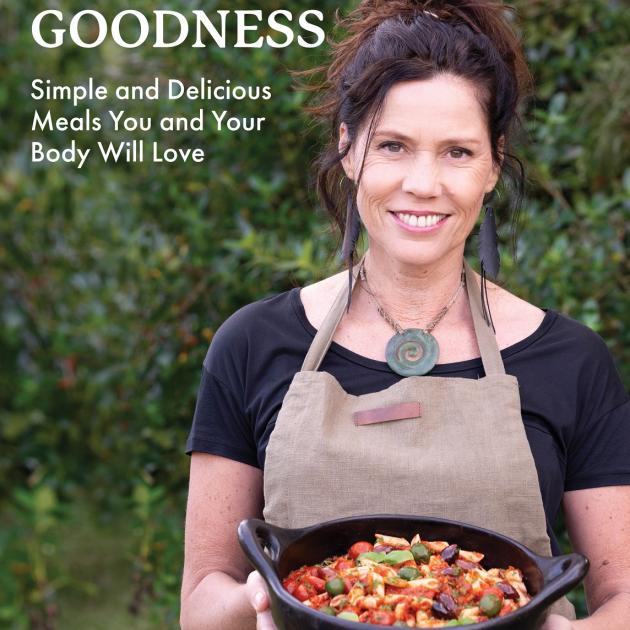
New Zealand plant-based wholefood chef Tracey Bennett loves nothing more than throwing on a pinnie, cranking up some sounds, and getting settled into her kitchen groove to see what’s in her to create that day.
"Being creative with food energises me, lights me up, grounds me, and helps me reconnect with who I am."
Bennett, aka therecklessfoodie.com, values being able to create something delicious and nutritious in a short space of time out of what’s in her cupboards and fridge, especially at this time of year. So her new cookbook Plant-Based Goodness shares what she has learnt along the way.
"Nuturing others through food is definitely a love language for me, and over the past three decades I have revelled in cooking for my hubby and kids, my extended family, my beautiful friends and now my grandbabies too."
In an extract from her new book, Bennett shares her helpful tips for moving towards more plant-based eating.
HELPFUL TIPS FOR TRANSITIONING TO PLANT-BASED EATING
1. Be prepared — shop regularly, so you have what you need to make easy, healthy food.
2. Control your food environment — ditch the junk food and any processed foods. Clean out your pantry and fridge regularly — remove temptations that don’t serve your health and wellbeing.
3. Keep cooked grains (brown rice or quinoa) in the fridge and always have plenty of salad greens — these are the building blocks for a quick healthy salad.
4. Consider doing "meal prep" for the week on a Sunday. You can make some meals for the week, your work lunches, maybe also a dressing for the week and some toasted seeds for sprinkling.
5. Always make extra when you make a meal — you can either take it for lunch the next day or freeze it in portions. It’s a no-brainer!
6. Keep it simple — start with a few new plant-based meals that you make regularly and enjoy. Then, slowly move up to between five and 10 favourite easy, nutritious plant-based meals and rotate these on a regular basis. Keep things fresh by adding in something new from time to time to mix up with the old faves.
7. Snack in between meals on seasonal fruits and veggies that you enjoy and on nuts and seeds — always have these available and handy.
8. Make veggies the HERO (the main component) on your plate, always. That’s both lunch and dinner; not just dinner. And eat multiple different veggies.
9. Have healthy sweet treats available for those moments of weakness when you need a sweet fix – most of us have these! Think a decadent little chocolate macaroon or a piece of crazy good peanut butter fudge!
10. If you fall off the wagon or go over to the dark side, don’t beat yourself up! First, notice and acknowledge if you enjoyed it; then, the key thing is to not give up and stay off-track for days or even weeks. Jump right back on that wagon and focus on things you know are going to serve your health and wellbeing.
THE BOOK
Plant-Based Goodness by Tracey Bennett, The Reckless Foodie, RRP $49.99
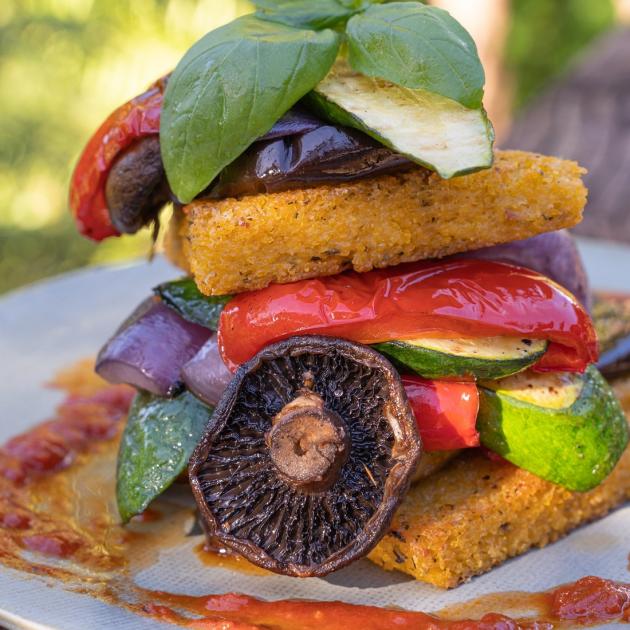 Polenta and roast vegetable stack

On a Mediterranean theme, here is a really vibrant, great-looking recipe that you could embellish to proudly serve at a dinner party, or dress down a little when you have a crowd over.
We dress up the polenta by cutting it into triangles, piling some colourful oven-roasted vegetables on top to create a stack, drizzling it generously with our epic slow-cooked tomato sauce (keep some ready in the freezer) and, to finish, a tickle of vibrant fresh basil leaves on top as a garnish - oh, Mamma Mia!
This is a superb dish - it looks so stylish and beautiful and leaves your taste buds craving for more of that savoury, umami goodness.
Serves 4-5
Suitable for GF, SF, NF
Italian baked polenta chips, but cut into triangles (see below)
A few good jiggles of olive oil
A few splashes of balsamic vinegar
4–6 cloves garlic, crushed
Natural sea salt and cracked black pepper
6–8 zucchini (courgettes), sliced long and thick
2 red capsicums, cut into long chunky strips
1 medium eggplant, cut into thick rounds
8–10 medium field or large Portobello mushrooms
A pot of Mamma Luigi's slow-cooked tomato sauce (see below)
Fresh basil to garnish
Preheat oven to 180°C fan-bake.
Method
The polenta takes about half an hour to bake until golden, so be sure to have it in the oven cooking away before you put the vegetables in to roast.
Once polenta has been in the oven for about 10 minutes, put veggies in and this should all come together nicely.
Place olive oil, balsamic vinegar, garlic, salt and pepper on some baking paper in an oven tray and mix it all up.
Place the prepared veggies into this mixture and mix them up with you hands, coating them generously with the oil mix.
Bake veggies for 15–25 minutes, until they look sumptuous and a bit browned but not overdone and mushy. NB: you could pop the zucchini in 5–10 mins after the other veggies to ensure they cook but don’t go soggy.
Towards the end of the cooking process, gently warm your pre-made tomato sauce.
Once you have all your cooked components hot and ready you can build your stacks. Place polenta triangles onto plates, two or three for each person. Then assemble a selection of roasted veggies on top of the polenta in an artful way.
Drizzle with a generous amount of steaming-hot slow-cooked tomato sauce and top with some fresh basil leaves.
If you are feeling arty, you can do a big swirl of tomato sauce around your stack as well.
Serve immediately with a crisp green salad on the side.
To dress down for a crowd, make a large batch of polenta triangles or chips and serve them with the slow-cooked tomato sauce and a colourful garden salad on the side.
Chef’s hints
Depending on the season, you can use other vegetables for this recipe, e.g. pumpkin, kūmara, red onion, parsnip.
Italian baked polenta chips / triangles
4 cups water
1 tsp natural sea salt
1 ½ cups coarsely ground polenta
½ cup soy milk (or other plant-based milk)
3 Tbsp nutritional yeast
1 tsp dried Italian mixed herbs
3-4 Tbsp olive oil
Method:
Bring water to the boil and add salt. Reduce to a medium heat and slowly whisk in polenta, stirring consistently to prevent any lumps forming. Once well mixed, slowly whisk in milk, yeast and herbs and then continue whisking until the liquid absorbs and the polenta thickens to a mash-like consistency.
This could take 5-15 minutes depending on the variety of polenta.
Taste and season with more salt and pepper and herbs if you like.
Line a 23cm by 30cm baking dish with baking paper. Tip in the polenta, spreading it out and smoothing the top as evenly as you can. Cool, then place in fridge to chill for at least an hour or until firm. Once firm cut into shapes. Preheat oven to 180°C fan-bake.
Lay on oven tray lined with baking paper, brush lightly with olive oil on both sides and bake for 30-40 minutes until golden, turning halfway through.
Mamma Luigi’s slow-cooked tomato sauce
This rich, flavourful sauce is an absolute beauty and is so incredibly versatile. It can go under things, be drizzled over things, be the main event (like a pasta sauce) or be added into dishes to boost flavour.
For me, it is a "go-to" staple and it can be made in bulk as it freezes well. While you can replace this sauce with a store-bought item, I don’t believe that anything will get near it in flavour.
The secret is in the slower cook, giving such richness and depth of flavour. Just like "Mamma Luigi" would do in her Italian kitchen! In tomato season, it’s very special made with fresh tomatoes; nothing like it, honies.
Suitable for GF, NF
Makes Large batch
3-4 Tbsp olive oil
3-5 cloves garlic (to taste), crushed
1 heaped tsp dried oregano or mixed Italian herbs
3 × 400g tins plain whole peeled tomatoes, tinned cherry tomatoes or chopped tomatoes (or equivalent fresh)
1 tsp natural sea salt and cracked black pepper (or to taste)
1 Tbsp maple syrup or coconut sugar
1 cup water, or as needed
Lemon zest and/or juice to taste (optional)
Method
Pour oil into a large saucepan over a medium heat, add garlic and saute for a minute or so.
Add dried herbs and mix together in the oil.
Add tomatoes and stir through.
Add all other ingredients, starting with 1cup of water, and bring to the boil. Turn down to a simmer and let gently simmer, partly covered, for 1-3 hours, until well reduced and all the tomatoes have broken down, resulting in a nice thick sauce consistency.
During this process, stir occasionally and add more water if needed. For an even richer sauce, you can cook for longer or put in your slow cooker with an extra cup of water and cook on low all day or overnight.
Serve over your favourite gluten-free pasta or baked polenta or include in any dishes that need a rich, flavoursome tomato sauce. Wonderful as a pizza base sauce, or use as a pasta sauce and add your favourite ingredients as suggested below.
Chef’s hints:
If you don’t have 3 hours to make this sauce, simmer it for 30-45 minutes instead and then part-mash it to a sauce consistency. It won’t have quite the depth and richness of flavour, but it will still be very yummy.
When using as a base for a pasta sauce, try adding olives, capers and lemon zest or chopped preserved lemon. Or, alternatively, chopped spinach, sauteed mushrooms, sun-dried tommies and pine nuts. Delicimo!
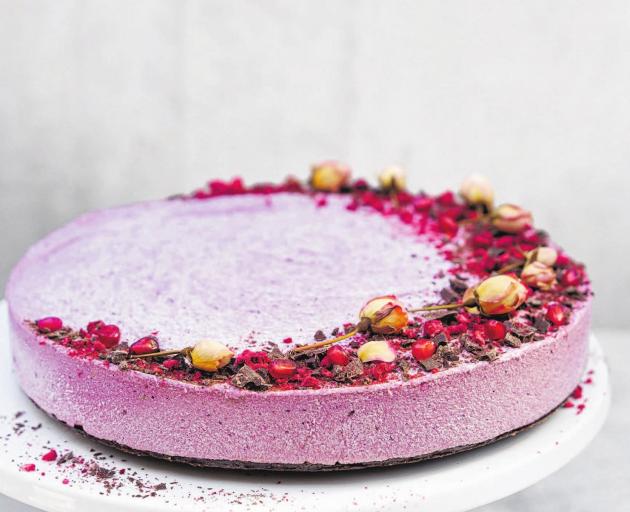 Heavenly raw berry cheesecake

This sublime and fruity creation is absolutely beautiful. I have served it at many a dinner party and it always goes down an absolute treat.
I personally love a chocolate and berry combo, so I have added cocoa powder to the base and decorated with some chocolate on top.
Sometimes I use mixed berries, and other times I use an individual berry, which slightly changes the shade of pink that it ends up.\
You can’t beat using fresh berries like strawberries when in season, and these look beautiful as a decoration on top with a few edible flowers.
Surprisingly, once you have the hang of it, this babe only takes about 30 minutes to put together. You can also make it a few days in advance for a special occasion.
Remember to soak your cashews for the filling ahead of time, though, to get the velvety texture we’re shooting for.
Serves 8-10
Suitable for GF, DF
NOTE: Cashews must be soaked for 8 hours
Crust
¾ cup pitted baking dates
1 ½ cups raw nuts of your choice (I like almonds, but you could also use walnuts or cashews or a combo)
½ tsp natural sea salt
¼ cup desiccated coconut
2 Tbsp quality dark cocoa or raw cacao (optional for a berry-choc vibe)
Filling
3 cups raw cashews, soaked overnight or for at least 8 hours, then drained and rinsed
¾ cup maple syrup
¾ cup melted coconut oil
1 tsp vanilla extract
juice of 2 limes (optional but highly recommended)
1½ cups fresh or thawed frozen berries of your choice
Decoration
chocolate curls
cocoa or cacao
coconut threads
dehydrated raspberries
fresh berries in season
Method
Line a 21cm–23cm cheesecake dish or pan with baking paper. For the crust, soak dates in warm water for 15 minutes to soften, then drain.
While dates are soaking, place nuts and salt in a food processor and blitz nuts into small pieces. Add coconut, and cocoa or cacao if using, and pulse to combine. Keeping the motor running, now add dates one at a time. The mixture will start to resemble dough and may even form a ball.
Tip the mixture into the prepared dish or pan and press evenly over the base. Place in freezer until needed.
For the filling, blend soaked cashews with maple syrup, coconut oil, vanilla and lime juice (if using) in a food processor or blender until it becomes a smooth, creamy mix. Add berries and blend again until silky smooth.
Pour filling over the crust in the dish and place in the freezer for about 2 hours, until firm. Decorate with chocolate curls, a dusting of cocoa or cacao, coconut threads and dehydrated raspberries, and refrigerate until ready to serve. Pop on some seasonal berries before taking to the table.
Chef’s hint
You can get decadent with this cake by folding some rough-cut dark chocolate chunks through the filling mixture once it’s smooth.
And if you want to make this dessert offering the most lush it can be, try serving it with whipped coconut cream and a berry coulis. Just divine.
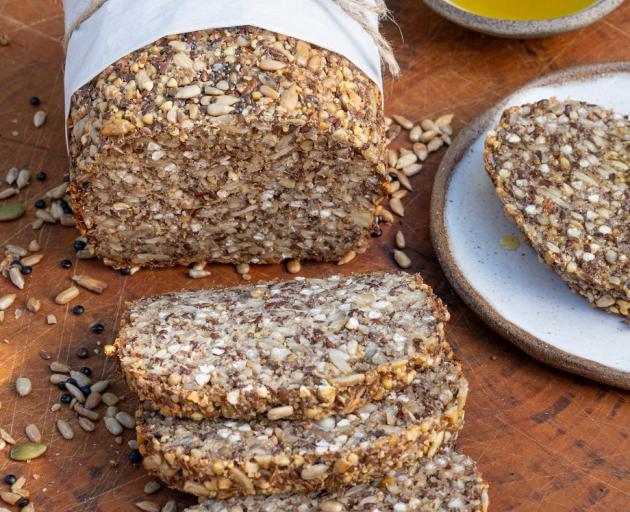 Best ever superseed loaf

Apart from authentic sourdough bread, I tend to mostly keep away from commercial breads and have a primarily wheat-free approach to eating. So having a scrumptious, seedy, gluten-free loaf is essential.
Look no further than this superb, easy recipe: delicious, nutty and insanely nutritious - and it requires no kneading, rising or special baking tricks.
Makes 1 loaf
Suitable for oil free, GF, SF
1 cup sunflower seeds
½ cup pumpkin seeds
½ cup almonds, chopped chunky
½ cup hulled millet
1½ cups buckwheat groats
2 Tbsp chia seeds
2 Tbsp sesame seeds
3 Tbsp psyllium husk powder
1 Tbsp maple syrup (optional)
3 Tbsp extra virgin olive oil
2 cups water
½-1 tsp fine natural sea salt (optional)
To grind
½ cup sunflower seeds
¼ cup raw almonds
½ cup raw buckwheat
Method
Line a loaf tin with baking paper. Use a smaller tin for a higher loaf and a squarer slice, as in the photo; use a larger, standard loaf tin for a flatter loaf and a rectangular slice.
Grind the three ingredients listed for grinding in a food processor until they resemble a chunky flour mix, but not too chunky. While we want to bite into little bits, overall it needs a coarse flour consistency. Place it in a large bowl, add all the other dry ingredients above and stir to combine.
In a separate jug or bowl, whisk maple syrup (if using), oil, water and optional salt. Add to the dry ingredients and mix very well until completely blended. The dough should be very thick but manageable. If it’s too thick, add 1–2 teaspoons more water.
Transfer to the prepared loaf tin and leave to soak, ideally overnight or all day, but for at least 2-4 hours before baking.
Once it’s soaked for long enough, preheat oven to 175°C fan-bake.
Bake the loaf in the middle of the oven for 40-60 minutes. Check it at 40 minutes, using a kebab stick or knife to check if it is cooked through.
Remove from the oven once done. Allow to cool in the tin for a few minutes, then remove using the edges of the baking paper and pop on to a wire rack. Once warm rather than hot, remove the baking paper and leave to fully cool.
Enjoy with your favourite toppings or on its own. This is a seriously delicious loaf that can be used for breakfast, lunch and dinner or morning/afternoon tea! Eat within 2-4 days, as it is quite moist and will go mouldy quickly if left in the pantry. Alternatively, freeze it in slices. To stop them sticking together, you can put torn-off bits of the baking paper you just used between each slice. Much safer than attacking the stuck slices with a knife!
Chef’s hint:
This bread is great toasted - just delicious with the iconic avocado and tomato with sea salt and cracked pepper. You could also enhance it nutritionally with a dollop of sauerkraut and a sprinkling of fresh sprouts - now we’re talking. Have fun creating all sorts of different topping ideas, like peanut butter and banana.


