

The book is plant-based, but you say you no longer adhere to a strictly plant-based diet?
I really loved my few years of being predominantly plant-based, and I know it did me a lot of good for that time of my life. And boy did I learn a lot! I'm pretty tuned in to my body and after a while I felt I needed more balance, so now, as well as eating a plant-rich diet, I enjoy a bit of everything in moderation. The difference is now I'm more aware of what I'm eating; more discerning, more intentional, and I eat with way more gratitude. It feels good.
What is your favourite daytime snack for yourself and for your boys?
The iron boost bars from Tasty are epic — they're nut-free and so nutritious, crammed with dates, apricots, hemp seeds, pumpkin and sunflower seeds — with rice puffs and toasted buckwheat for some crunch. Hemp seeds are my secret weapon for everything. The ultimate superfood.
How do you juggle the meal time/bath time madness hours?
I have good days and s... ones with all that, I can tell you. I've started giving the kids dinner in the afternoons pretty much straight after school which helps, and then just a healthy snack and a smoothie later on. It works for us, anyway. I'm lucky because I work from home so I can (technically) prepare something during the day, but you'd be surprised how often I leave it until the last minute anyway. It's still chaos though.
What are the handiest ingredients you always have in your pantry?
The gluten-free flour blend (recipe in Tasty) is a complete game-changer if I'm ever baking for GF folk. Legit, it makes the best cakes, muffins, pancakes, loaves and cookies. Hemp seeds (for smoothies and salads and baking and everything in between). Coconut sugar, agave and maple syrup (I use these instead of cane sugar for most things now, they are found all through the book). Good quality stock powder (flavour boost for everything). White pepper (most underrated spice ever!). To be fair my pantry is crammed and it really needs a clean-out right now. Anyone offering?
What is the most challenging thing about writing a cookbook?
What is your favourite recipe from the book?
I seem to move from one "favourite" to another as I rediscover the recipes in the book once it's finally printed. For a long time it was the Dreamy Apricot Shortcake. But at the moment, the Brownie is on heavy rotation. It's heavenly and so easy to make — with no cane sugar! And savoury-wise ... the Aloo Palak (potato and spinach curry) is just divine. Hence why it's the first recipe in the book!
What kitchen implement wouldn't you be without?
My trusty Chelsea Winter kitchen knife set (legit the best ones I've used) and also the giant garlic crusher I got in Italy at a second-hand store.
Who inspires you cooking wise?
So many people inspire me that I couldn't pick just one. When I first started out cooking, it was Alison Holst. She holds such a special place in my heart.
How do you keep enthused in the kitchen?
Sometimes it's hard when it becomes a daily grind, cooking for the family, to be honest. But when I'm writing a book, a continuous flow of energy and excitement and inspiration comes through me. I truly love what I do, and I have a special reserve for creating recipes for Kiwis. I feel so bloody lucky I get to do it for a living. And even more blessed that so many people resonate with my books and enjoy the food.
The book
Extracted from Tasty by Chelsea Winter. Photography © Tamara West. RRP$55.Published by Allen & Unwin NZ.
 Lemon cream pie
If you’re a lemon fan (and honestly, who isn’t?), you’re gonna want to try this because I have not held back on the zesty citrus injection. It’s such a refreshingly easy recipe to make — I especially love the crust part because there’s no precarious rolling, flipping or transferring of pastry and no faffing with baking beads or sagging during cooking — just squidge the base evenly into the tin, bake naked (the tart, not you), cool, then add the cooked lemon filling (also a cinch to make). It’s a little rustic yet still very elegant, and it tastes utterly divine. I’ve made the crust gluten-free (which I recommend as it’s so crispy), but you can also use plain flour (see tip)
Serves 6
Ingredients
½ cup ground almonds
½ cup brown rice flour
½ cup buckwheat flour
2 Tbsp tapioca flour, arrowroot flour or cornflour
⅓ cup coconut sugar
2 tsp psyllium husk
½ cup coconut oil, melted but not hot
2 Tbsp just-boiled water
1 tsp pure vanilla extract
Filling
2 cups full-fat coconut cream (I use the Kara brand in a carton)
½ cup + 1 Tbsp agave syrup or maple syrup
3 Tbsp coconut oil
3 Tbsp plant-based butter
3 Tbsp lemon zest
½ cup lemon juice
¼ tsp ground turmeric
¼ tsp salt
¼ cup cornflour mixed with ¼ cup plant-based milk to make a slurry
To serve (optional)
Fresh berries, such as raspberries, blueberries or sliced strawberries
edible flowers
whipped cream (plant-based if preferred)
Method
Preheat the oven to 180°C regular bake and have a 23cm round pie tin, tart tin or springform cake tin ready.
To make the base, combine the ground almonds, flours, sugar, psyllium husk and a pinch of salt in a medium mixing bowl. Make a well in the centre and add the coconut oil, hot water and vanilla. Stir until the mixture just comes together.
While it’s still warm, crumble two-thirds of the mixture around the edges of the tin (the sides of the crust will be a little thicker than the base) and press it 3-4cm up the sides of the tin (you can use the back of a dessert spoon for this). You want the edges to be an even thickness.
Crumble the remaining dough over the base and press it down into an even, smooth layer (you can use the back of the spoon or the base of a metal measuring cup for this). It should end up about 5mm ¼thick. Take care that it’s not too thick where the base meets the sides, or it ends up like a massive wedge. Lightly press down any jagged ridges on the sides with a finger.
Bake for 15 minutes, then remove from the oven and allow to cool completely before filling.
To make the filling, place the coconut cream, agave or maple syrup, oil, butter, lemon zest and juice, turmeric and salt in a medium saucepan. Stir in the cornflour slurry. Place over a medium heat and stir constantly with a whisk until thickened — it might take a while, then suddenly start thickening, so don’t leave it alone. It should start to bubble a bit and be the consistency of thick, shiny custard.
Remove from the heat, transfer to a mixing bowl and to allow to cool — don’t refrigerate it. If you like, you can lay a piece of clingfilm on the surface to stop a skin from forming.
When the filling is lukewarm, whisk it quickly to smooth out any lumps, then scrape it into the baked crust. Cover and refrigerate for at least 6 hours to set properly — leave it overnight if you can.
When ready to serve, scatter the top with berries and edible flowers (if using) and serve with whipped cream on the side if desired.
Leftovers can be stored in an airtight container in the fridge for a day or two.
TIPS AND SWAPS
• Dairy-free whipping cream is now available at all good supermarkets.
• If you’re not eating gluten-free, you can use 1 cup plain flour in place of the flours.
• Cook the base for 20 minutes.
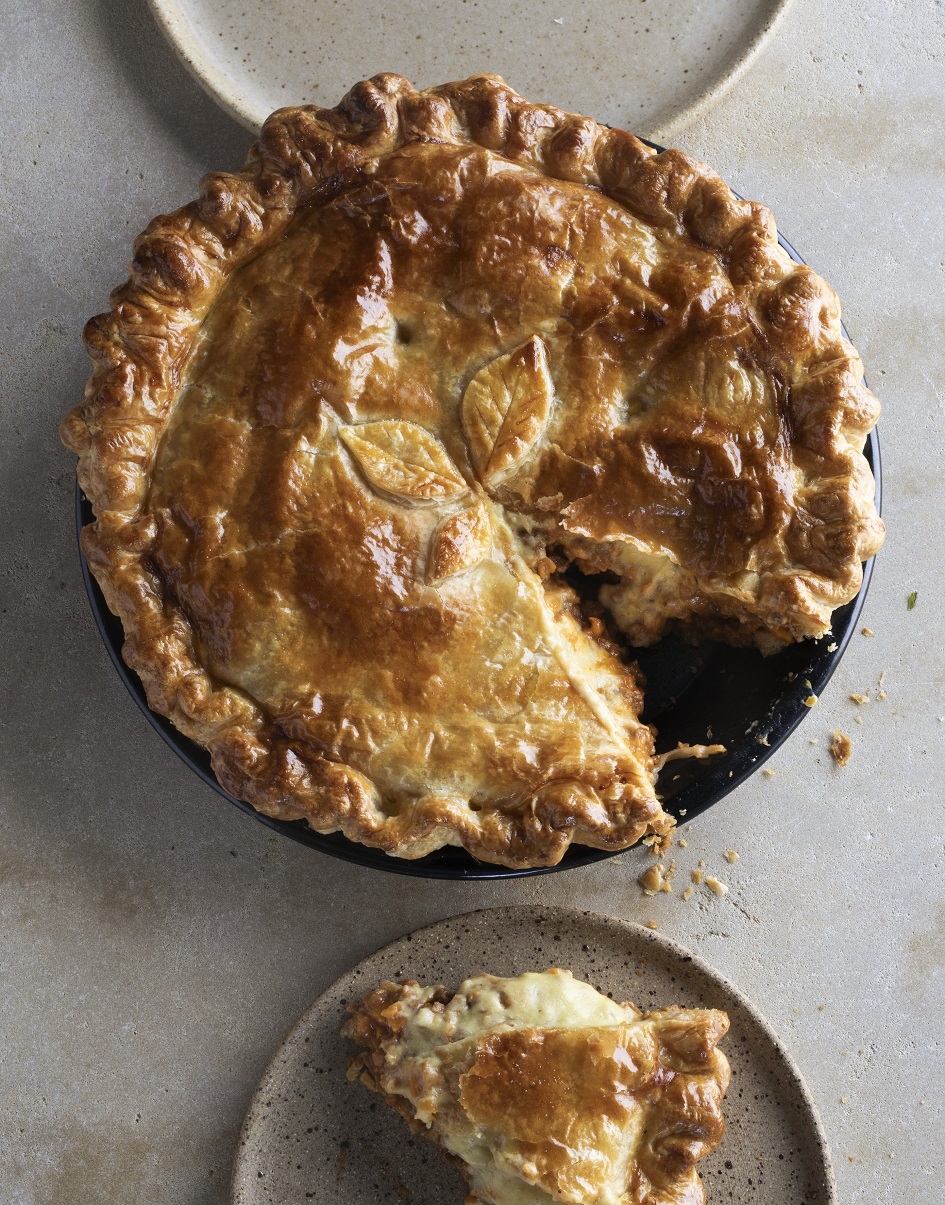 Mince and cheese pie
When creating this recipe I wanted something as close to a good old classic Kiwi M&C pie as possible — like, proper tuckshop-esque feels. Lentils simply wouldn’t do as the default here (although there’s an option to sub them in the tips). So I’ve chosen textured soy protein, which ends up being so close to the texture of cooked beef mince that no-one would ever know it wasn’t. So that’s a win. As for the cheese component, because plant-based cheese tends to disappear when it melts, I’ve created a "cheese sauce" layer so you can really see it (and get stuck into it). For a gluten-free option you could try gluten-free pastry sheets — or just make it into a scrumptious cheesy cottage pie with a mashed-potato topping.
Serves 6
Ingredients
Filling
⅓ cup extra virgin olive oil
2 large onions, finely chopped
2 large carrots, peeled and finely chopped
2 stalks celery, finely chopped
6 cloves garlic, crushed or finely chopped
1½ Tbsp finely chopped rosemary leaves
2 cups dried textured soy protein
4 cups vegetable or imitation chicken stock
⅓ cup tomato paste
2 Tbsp cornflour mixed with
¼ cup water to make a slurry
1 Tbsp Vegemite, Marmite or gluten-free miso paste
1 Tbsp malt vinegar
1 Tbsp paprika
2 tsp soy sauce or tamari
1 tsp mustard powder or
1 Tbsp dijon mustard
1 tsp imitation beef or chicken stock powder
1 tsp salt
½ tsp fine black pepper
Sauce
⅓ cup flour (gluten-free if preferred)
2 cups plant-based milk
⅓ cup grapeseed or sunflower oil
¼ cup nutritional yeast flakes
1 cup grated plant-based cheese
To assemble
3-4 sheets flaky puff pastry (plant-based if preferred)
¼ cup aquafaba (the liquid from canned chickpeas), plant-based milk or a beaten egg
Method
To make the filling, place the oil in a large casserole dish or deep pan over a medium heat. Add the onions, carrots, celery, garlic and rosemary and cook, stirring often, for about 15 minutes until the veges are soft and turning golden.
Add the soy protein, along with the remaining filling ingredients. Cover and simmer on a low heat for about 30 minutes, stirring frequently so it doesn’t stick.
Remove the lid, then continue to simmer over a medium-low heat for another 30 minutes or more until you have a thick sauce. Remove from the heat. I always find it better to cool the filling right down before baking it in the pie — you can even leave it overnight in the fridge if you need to.
To make the cheese sauce, make a slurry with the flour and ½ cup of the milk. Transfer to a medium saucepan, add all the remaining ingredients except the cheese, and place over a medium heat. Stir constantly with a whisk for 5-10 minutes or until thickened up. It will be thicker than a normal white sauce. Using a wooden spoon, stir in the cheese. Season to taste with salt and pepper and set aside.
When ready to cook the pie, preheat the oven to 190°C fan bake and set a rack in the lower half of the oven.
Line one large pie tin or two smaller pie tins with pastry. Add the cooled mince filling, then spread the cheese sauce on top. Brush the pastry edges with water where they will join and cover with a pastry lid. If you like, cut nice little shapes for the top.
Brush the top of the pie with the aquafaba, milk or beaten egg, prick a couple of steam holes and bake in the lower half of the oven for about 45 minutes, or until the pastry is deep golden in colour. You can give it another coating halfway through cooking if you like for more colour.
TIPS AND SWAPS
• You can pulse the carrots, celery and garlic in a food processor instead of finely chopping them — just don’t let them turn to mush. I always chop the onions by hand as they seem to caramelise better.
• If you can’t find dried textured soy protein, you can use 3 x 400g cans brown lentils (drained and rinsed) and pulse 400g mushrooms in a food processor. Add both at the simmer stage.
• Many brands of store-bought puff pastry sheets are "accidentally" dairy-free as they contain vegetable oils rather than butter — check the ingredients.
• I use half a Massel beef-style or chicken-style stock cube in place of the stock powder.
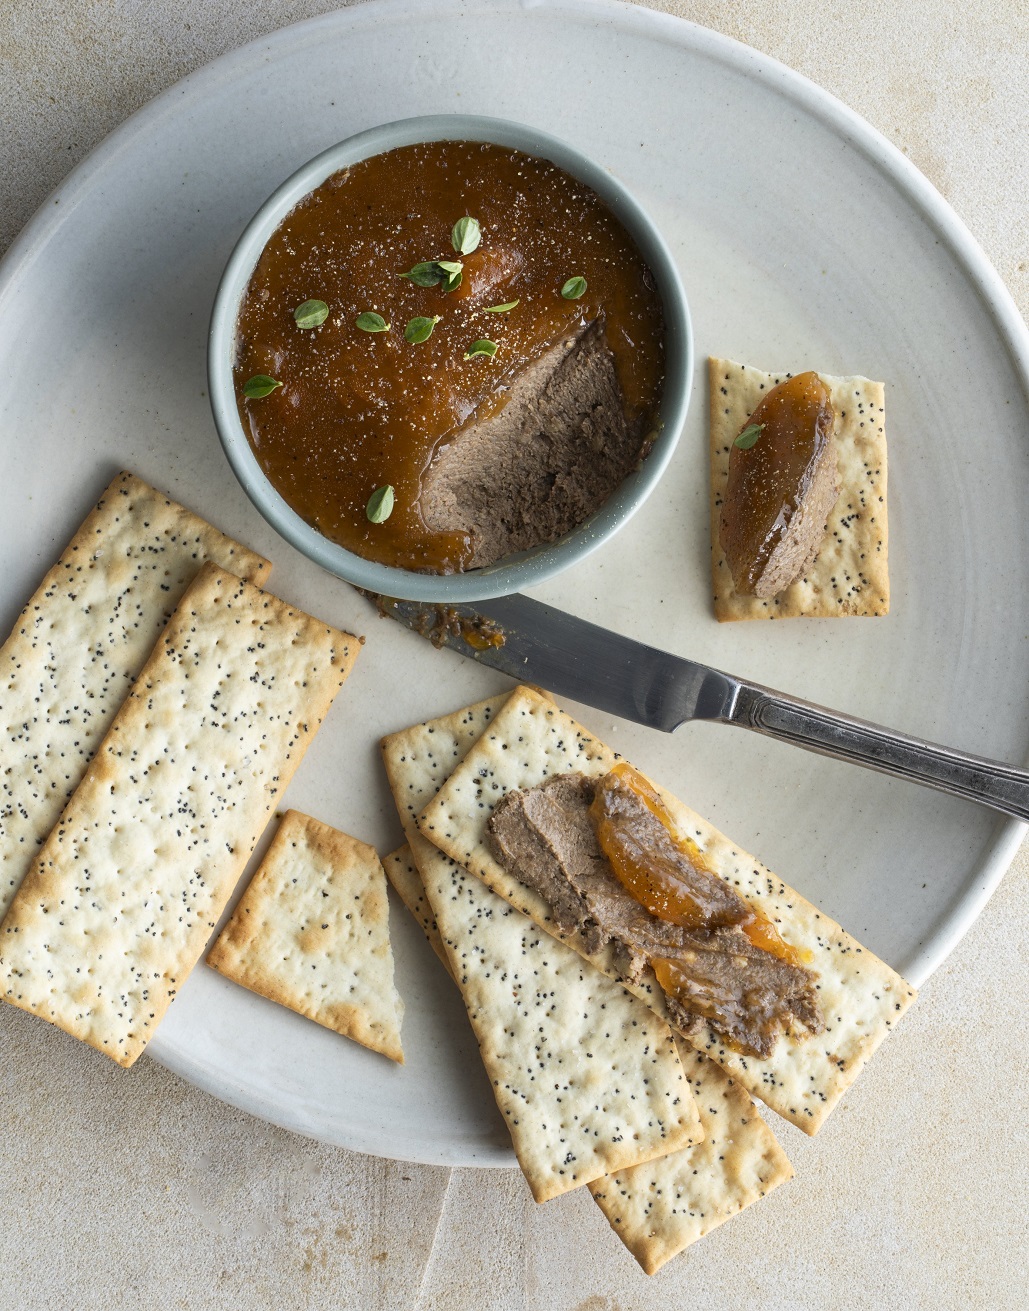 Fancy pate
I’ve had a number of (quite discerning) people taste this pate and seem mildly taken aback by the fact that it’s so like a traditional pate — obviously in the way it presents itself, but even the texture and the rich flavour it boasts. No need for livers, if that ain’t your thing. It’s a welcome addition to any kind of grazing or entertaining platter, or perfect served by itself on mini toasts, crackers or crostini when you want a mouthwatering little morsel with a glass of something chilled. In other words, when a bag of chips and a punnet of dip simply won’t do.
Makes about 1 cup
Ingredients
Pate
6 Tbsp plant-based butter or refined coconut oil
2 large shallots, sliced (about ½ cup)
250g brown button mushrooms, thinly sliced
3 cloves garlic, finely chopped
1 tsp fresh thyme leaves
¾ cup roughly chopped walnuts
1 Tbsp balsamic vinegar
1 tbsp white (shiro) miso paste
½ tsp salt
¼ tsp fine black pepper
Topping
⅓ cup apricot jam (sugar-free if preferred)
2 tsp cornflour mixed with 2 Tbsp water
2 tsp lemon juice
¼ tsp mixed spice
To serve (optional)
crackers, crostini or bread of your choice
pickles, olives and cheeses
(plant-based if preferred)
Method
To make the pate, melt half the butter or oil in a pan over a medium-low heat. Add the shallots and cook for 6–7 minutes, stirring often, until beginning to turn golden.
Add the mushrooms, garlic, thyme and the remaining butter or oil and cook for another 7 minutes, stirring often, until fragrant and soft.
Add the walnuts and vinegar and cook for a further 3 minutes, stirring.
Remove from the heat and stir in the miso, salt and pepper. Allow to cool for about 10 minutes, then transfer to a food processor and whizz for a good 5 minutes until it’s as smooth as possible. You’ll need to scrape down the sides a few times.
Transfer the mixture to a ramekin or smallish container, smooth the top and give the dish a bang on the chopping board to knock out any air pockets.
Top with a little cracked pepper, cover and refrigerate until cold.
To make the fruity topping, combine all the ingredients in a small saucepan over a medium heat. Simmer for a couple of minutes, stirring, until thickened and clear. Check the flavours and season to taste with salt and pepper.
Remove from the heat and allow to cool for a few minutes.
When the topping has cooled, pour it over the pate and refrigerate for a couple of hours until set.
Serve with crackers, crostini or bread, accompanied by pickles, olives and your favourite cheeses.
TIPS AND SWAPS
• To make an even easier topping, you can melt down fruit paste (the one you’d put on a cheeseboard) with a splash of water and pour it on top of the pate before refrigerating to set.
• Refined coconut oil is a flavourless oil that’s able to tolerate high heat. It might be labelled "coconut cooking oil" at the supermarket.


