"At the end of the day we’re human. There will be times you fall off the wagon, and that’s OK. Keto is a lifestyle change so focus on your overall journey and progress."
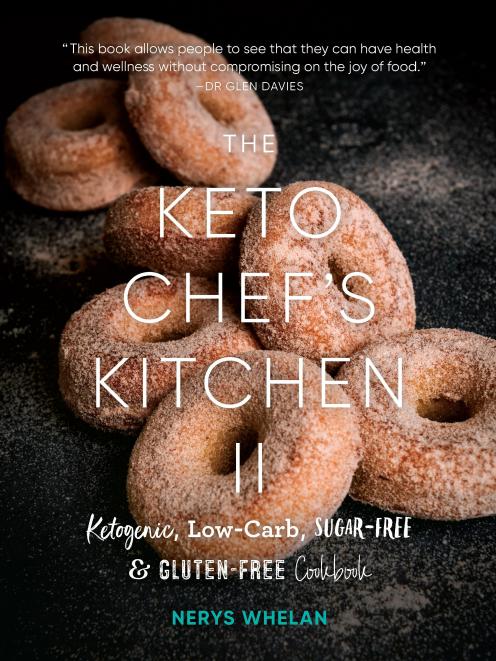
Her first recipe book won second place in the "Diet" category at the prestigious Gourmand and World Cookbook Awards last year and her second book The Keto Chef’s Kitchen II provides more of the same advice and inspiration for those following a keto diet.
"I have so much fun creating recipes - but it’s not always easy. Finally getting a recipe right is the most fantastic feeling, but getting there is trial and error on a whole new level."
She has worked with Dr Glen Davis, a doctor working in metabolic disease and lifestyle medicine, who says food is more than nutrients and fuel and it is possible to have health and wellness without compromising on the joy of food.
A keto diet significantly reduces using glucose as fuel, turning off the making of new fat and leaving only dietary fat and stored fat for fuel. Insulin controls the balance as it carries the glucose around the body to use as energy.
"Keto can seem like a lot to get your head around, but it comes down to one thing: controlling the insulin levels in your body."
For most people the challenge is converting the keto diet into the keto lifestyle but having a collection of inspiring recipes will prevent boredom and support lifelong maintenance, he says.
As well as recipes - including vegetarian and gluten-free - Whelan has advice on sweetners, tips for eating out and how to start keto.

Turmeric Thai chicken curry recipe
Makes 4 portions
Suitable for GF, sugar-free, DF, egg-free
3 Tbsp olive oil
8 chicken thighs, skinless, boneless
1 small onion, sliced
3 Tbsp red curry paste, low-sugar
1 Tbsp fresh ginger, finely grated
1 clove garlic, crushed
2 tsp ground coriander
1½ tsp ground turmeric
1 tsp salt
½ tsp white pepper
400ml coconut milk
½ head broccoli or 2 bunches broccolini
1 lime, zest and juice
Method
Preheat a heavy-based pot over a high heat. Once hot, add 2 tablespoons of oil and sear the chicken thighs on both sides until golden brown. Remove them from the pot and set aside.
In the same pot, add another tablespoon of oil and the sliced onion, and cook until translucent. Then add the curry paste, ginger, garlic, coriander, turmeric, salt and pepper. Cook for another 2–3 minutes until fragrant.
Add the coconut milk and return the chicken to the sauce. Turn it down to a low heat and simmer for 15–20 minutes until the chicken is cooked through.
Cut the broccoli into florets, or trim the broccolini, and add them to the sauce. Cover the pot and simmer for another 4–7 minutes until the broccoli is tender.
Lastly, stir through the lime zest and juice, then taste and adjust the seasoning, if needed.
Nutrition Note: Turmeric is well known for its anti-inflammatory and antioxidant properties.

Spring onion pancakes recipe
Makes 4
Suitable for GF, sugar free, plant-based
200g ground almonds
30g psyllium husk powder
2 tsp Xanthan gum
1 tsp baking powder, gluten-free
½ tsp salt
¼ tsp White pepper
100ml to 170ml boiling water
2 spring onions, thinly sliced
4 Tbsp olive oil
Method
Place the ground almonds, psyllium husk, xanthan gum, baking powder, salt and pepper into a bowl. Whisk to combine and remove any lumps.
Add 100ml boiling water to begin with and stir to mix, adding a little more water as needed to make a dough. It can look dryer than it is, so it’s best to get your hands in to feel it!
Wrap the dough in cling film and set aside for 5 minutes. The psyllium husk will absorb a bit more liquid so the rest time is essential so you can add more water, if needed, before continuing.
After 5 minutes, unwrap the dough and squeeze it. It should feel a bit tacky but not crack too much. If needed, knead in a little more water.
Cut the dough into four. Working with one piece at a time, roll out between two sheets of baking paper into a circle about 2mm thick. Sprinkle over a quarter of the chopped spring onion, then fold it in half. Roll again to 2mm thick, then repeat the process with the remaining dough.
Preheat a non-stick frying pan over a medium heat. Once warm, add 2 tablespoons olive oil and 1 or 2 pancakes, depending on the size of your pan.
Cook over medium heat until golden brown on each side.
Repeat the cooking process with the remaining pancakes.
Nutrition Note: Psyllium husk is a rich source of fibre for maintaining good gut health, and it helps with glycaemic control.

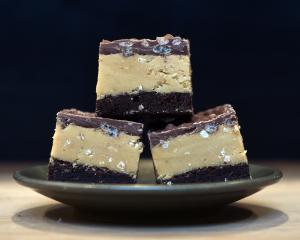
Peanut butter cup slice recipe
Makes 24 portions
Suitable for GF, sugar-free, vegetarian, egg-free
For the base
150g butter, melted
200g ground almonds
90g allulose
50g cocoa powder
35g peanuts, chopped
½ tsp ground cinnamon
For the peanut butter layer
500g smooth peanut butter (no added sugar)
80g unflavoured or vanilla, low-carb protein powder
150g Allulose
1 tsp Vanilla paste or essence
For the chocolate
200g sugar-free dark chocolate, chopped, or baking bits
40g coconut oil
35g peanuts, chopped
Method
Preheat your oven to 170°C fan bake and line a 20cm × 30cm slice tray with baking paper.
In a bowl, mix the base ingredients together and press evenly into the bottom of the lined tray.
Bake for 8-10 minutes until the top looks dry, then press the base down with a flat object or the back of a spoon. Allow the base to cool completely at room temperature before continuing.
Heat the peanut butter in a double boiler or in a microwave-safe bowl on low, stirring every 30 seconds, until it has thinned out and is easy to mix.
Stir in the protein powder. If you’re using a vanilla protein powder, it may have sweetness in it already, so start with half the sweetener, then taste the mix and add more as needed.
Stir through the vanilla and mix until combined, then set it aside.
Melt the chocolate and coconut oil in a double boiler, or in a microwave-safe bowl, stirring every 30 seconds.
Once the chocolate is smooth, pour it into the peanut butter bowl and fold it through 3-5 times. You don’t want to completely mix the chocolate and peanut butter so the less mixing the better. Alternatively, you can do a layer of peanut butter filling, then just pour the chocolate on top.
Spread the peanut butter chocolate layer over the base and sprinkle with the chopped peanuts. Set it in the fridge for 3-4 hours before cutting into 24 portions.
Store in an airtight container in the fridge or freezer.
Nutritional information per portion: Net carbs 3g, fibre 6.2g, fat 26.7g, protein 10.6g, calories 30