Sometimes when the winter gloomies are descending getting friends and family together for a bit mid-winter celebration is a great excuse to break out the special baking.

Auckland baker Michelle Morfett, of Mint Cakery, has just the recipes to inspire in her book of the same name.
She started out with a market stall at the Hobsonville Markets in 2014 and now has her own shop in Ellerslie where she and her team make cakes to order, donuts, cinnamon buns - everything sweet.
She has self-published Mint Cakery, starting the journey when her son was only 5 months old and finishing it when he was about 15 months old.
“I don’t know what I was thinking - shop work, baking, baby and book stuff was pretty hectic.”
Morfett has dedicated the book to her most popular shop treats - from scones and muffins to a whole chapter on donuts and even confectionery - with recipes that are delicious but easy, as well as including a few baking techniques to help.
• How to make icings, chocolate shards, brandy snaps and salted caramel sauce are included below the main recipes.

Christmas bundt cake
This is our take on a Christmas-style cake without being a traditional yuck one. This recipe is nice and light with more focus on the spice rather than all the dried fruit. It’s still nice and boozy though!
SERVES 14-16
Preparation time: 45 minutes
Bake time: 40-45 minutes
225g unsalted butter, softened
1 tsp vanilla essence
225g icing sugar
4 eggs
200g plain flour
100g ground almonds
3 tsp baking powder
1 tsp cinnamon
1 tsp mixed spice
200ml milk
70g pecans, chopped
100g raisins
150ml brandy
ICING AND GARNISHING
1 batch of cream cheese buttercream (see below)
1 batch of salted caramel sauce (see below)
Fresh cherries
1 batch of brandy snaps, broken into shards (see below)
Fresh mint sprigs
Method
Preheat your oven to 150degC fan bake. Spray a Bundt tin with oil.
Put butter, vanilla and icing sugar in your stand mixer and beat. Alternatively, use an electric beater. Once the mixture is light and fluffy, add all of the eggs at once, and beat until they are mixed in. Scrape down the bowl and give it another mix.
Sift flour, baking powder, cinnamon and mixed spice together and add it to the butter mixture. Add the ground almonds, too. Mix to combine.
Pour in your milk straight away in a slow, steady stream. Give the sides of the bowl a scrape down and mix again until the cake batter has just come together.
Fold in the pecans and raisins.
Spray oil your Bundt tin again and pour your batter in. Bake for 40-45 minutes or until a skewer inserted into the middle of the cake comes out clean.
Remove from the oven and leave to cool in the tin for 15 minutes, then flip it on to a wire rack to finish cooling.
When the cake is cool, brush the brandy over the cake with a pastry brush.
To decorate, fill your piping bag with cream cheese buttercream. Pipe the icing around the top of the Bundt cake using a zig-zag motion with your wrist. Do a second layer of icing on top of the first so you get a good thickness of icing.
Drizzle over the salted caramel and decorate with fresh cherries, brandy snap shards and mint sprigs.
It can be stored in an airtight container at room temperature for one day or in the fridge for four days.

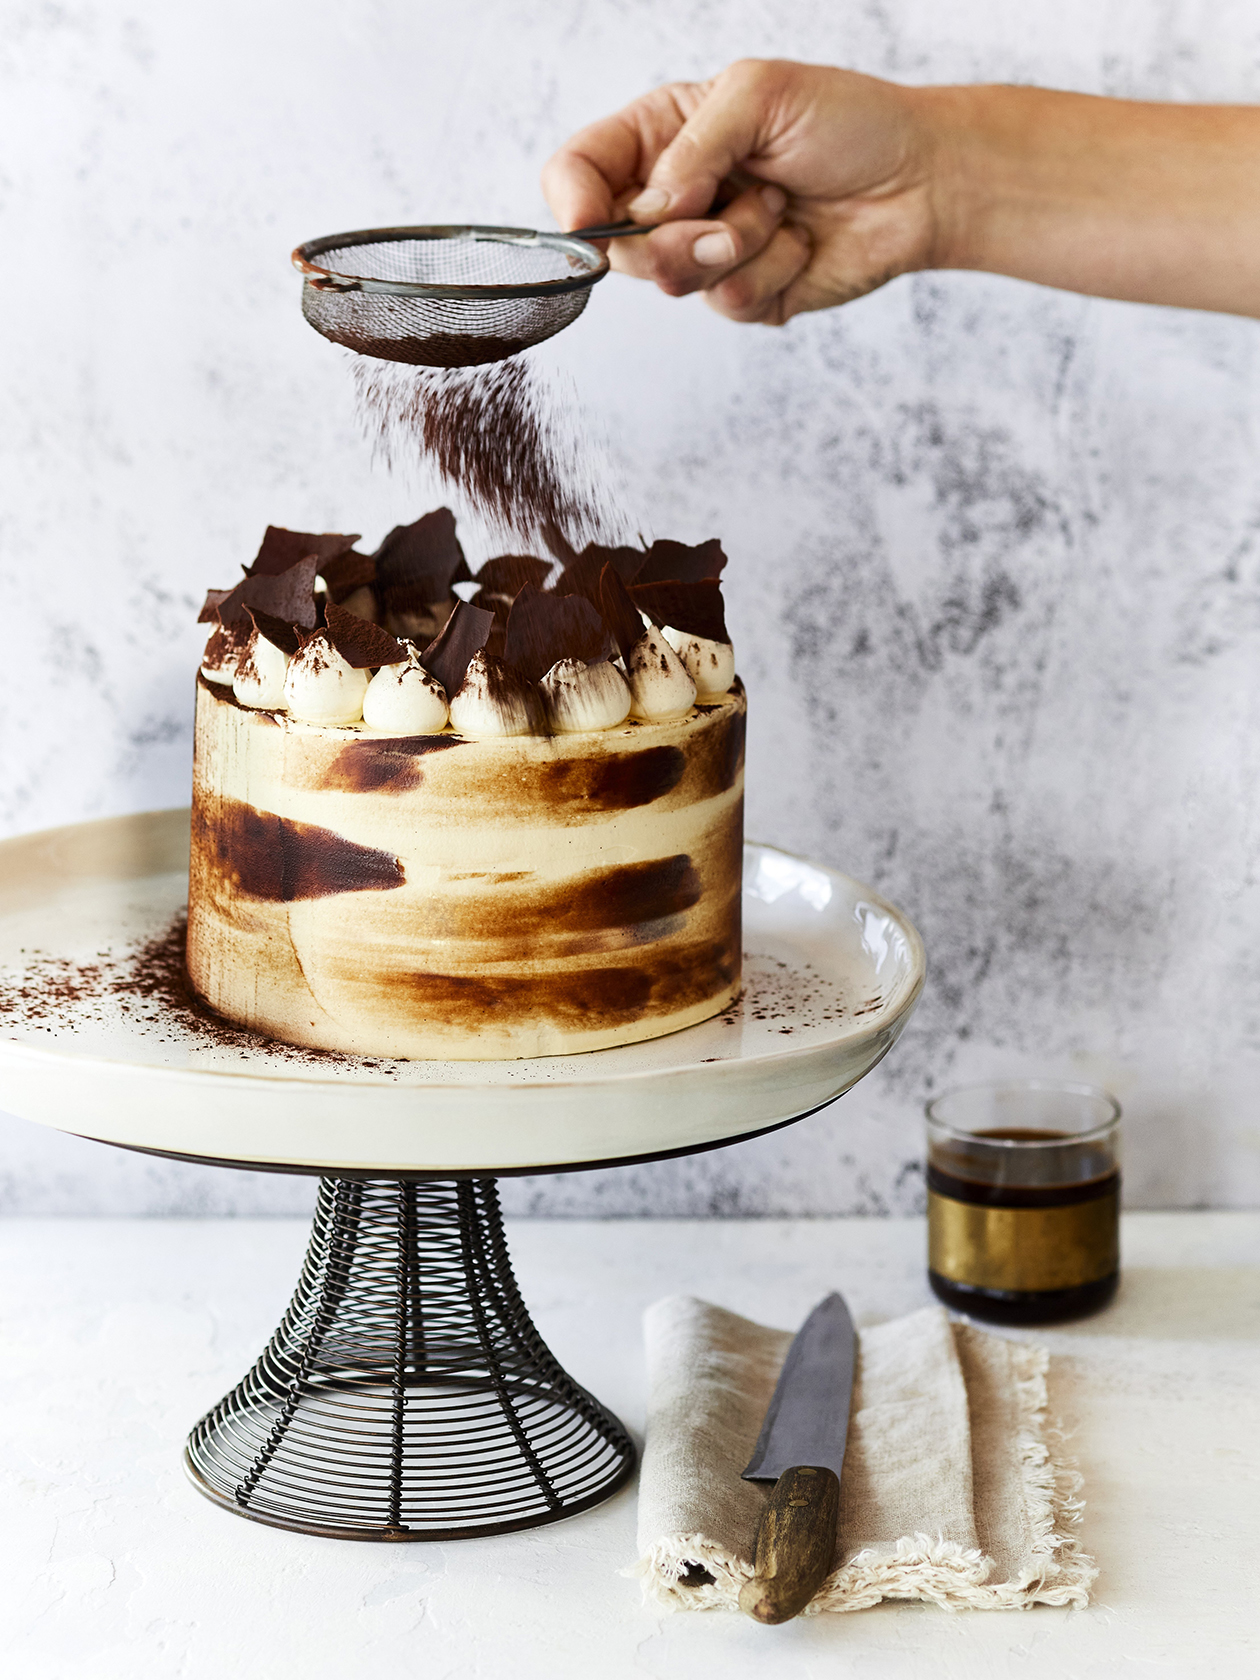
Tiramisu layer cake
Coffee and chocolate are the most delicious combination - add some booze and you can’t beat it. This is our take on the classic dessert, in cake form. Yum!
SERVES 14-16
Preparation time: 1 hour 30 minutes
Bake time: 40-45 minutes
CAKE BATTER
190g unsalted butter, softened
2 tsp vanilla essence
360g icing sugar
3 eggs
340g flour
20g baking powder
300ml milk, warmed
COFFEE SOAK
2 Tbsp instant coffee granules
60ml hot water
20g caster sugar
100ml Kahlúa
ICING AND GARNISHING
1 batch of chocolate ganache for filling and decoration (see left)
1 batch of vanilla buttercream for icing the outside of the cake cocoa powder, for dusting 1 batch of chocolate shards (see right), for decoration
Method
Preheat your oven to 150degC fan bake. Line two 18cm cake tins with baking paper and spray with oil.
Cream your softened butter, icing sugar and vanilla in a stand mixer or with an electric beater. Once the mixture is light and fluffy, add all of the eggs at once, and beat until they are mixed in. Scrape down the sides of the bowl and give it another mix.
Sift your flour and baking powder together, add this to the mixture and beat. Pour the milk in a slow, steady stream. Scrape the sides of the bowl again and continue mixing until the cake batter has just come together.
Divide the batter evenly between the two prepared tins and bake for 40-45 minutes or until a skewer inserted into the middle of the cake comes out clean.
Remove from the oven and leave to cool in the tin for 30 minutes and then turn on to a wire rack to finish cooling down completely.
COFFEE SOAK
Mix all the ingredients for the coffee soak together and stir until the coffee and caster sugar have dissolved. Pour the coffee soak over both baked cake layers, and use a pastry brush to disperse it evenly.
STACK THE CAKE
Place your first layer of cake on to a cake board, top the cake with the chocolate ganache, reserving some for final decoration, and use a palette knife to spread it to the edges. Place the second layer of cake on top and push down ever so slightly, so the cake adheres to the ganache. Put the cake in the fridge to set for 15 minutes. This makes it easier to ice the outside of the cake: when it is fridge cold the cake layers won’t slip out of place.
CRUMB COAT
Using a palette knife, spread some of the buttercream over the cake and down the sides. Use a cake scraper to remove any excess icing and smooth it down. Put the cake back into the fridge for another 15 minutes so the crumb coat can set to fridge cold.
ICE THE CAKE
Before you do the final layer of vanilla buttercream, place your icing back in the stand mixer on slow or use an electric beater to burst any air bubbles in the icing that have formed from it sitting.
Scoop buttercream on to the top of your cake, reserving some for final decoration, then use a palette knife to cover down the sides of the cake. Use a cake scraper to smooth it off.
Get your remaining chocolate ganache and put small teaspoon-sized blobs of ganache all over the sides of the cake. Scrape smooth with your cake scraper to pull the ganache through the vanilla buttercream. Put the cake back in the fridge to set.
DECORATE
To decorate the top of the cake, fill a piping bag with your remaining vanilla buttercream and pipe it around the edge on top of the cake. Dust the entire cake with cocoa powder and decorate with chocolate shards.
Keep in the fridge until an hour before you are ready to serve, and enjoy at room temperature. Keep in an airtight container at room temperature for two days or in the fridge for four days.

Sticky date cake with toffee sauce
This cake gets so many compliments in the bakery. It’s a little bit time-consuming, but that is the difference between baking something average and something amazing. Put in the time and effort; it will be worth it!
SERVES 10-12
Preparation time: 1 hour
Bake time: 40-45 minutes
200g dates, chopped
1 tsp baking soda
300g water
60g unsalted butter
1 tsp vanilla essence
200g brown sugar
200g plain flour
1½ tsp ginger
½ tsp salt
2 tsp baking powder
2 eggs
ICING AND GARNISHING
1 batch of cream cheese buttercream (see below)
1 batch of toffee sauce (use the same recipe as the salted caramel sauce, just replace the caster sugar for brown sugar)
70g pecans, roughly chopped
½ batch of brandy snaps
Extra dates, chopped edible flowers
Method
Preheat your oven to 150degC fan bake. Line a 20cm round tin with baking paper and spray with oil.
Heat dates, baking soda and water in a saucepan over medium heat for about 5 minutes, or until the dates have softened. Remove from the heat, add the butter, vanilla and brown sugar and whisk in to combine. Set aside.
In a separate medium bowl, whisk the flour, ginger, salt and baking powder together. This is your dry mixture.
Using the paddle attachment on your stand mixer or an electric beater, combine date mixture and eggs. Add your dry ingredients and mix again to bring the batter together.
Pour your batter into the prepared tin and bake for 60-70 minutes or until a skewer inserted into the middle of the cake comes out clean. Remove from the oven and leave to cool in the tin for 30 minutes and then turn on to a wire rack to finish cooling down completely.
Fill a piping bag with the cream cheese buttercream and pipe a border around the top of the cake, then fill the centre with icing and smooth out with a palette knife.
Drizzle the toffee sauce around the top of the cake. Place candied pecans, brandy snap pieces and date pieces in a ring around the outside on top of the icing. Finish with edible flowers.
This cake can be stored in an airtight container at room temperature for one day or in the fridge for four days.

Icings
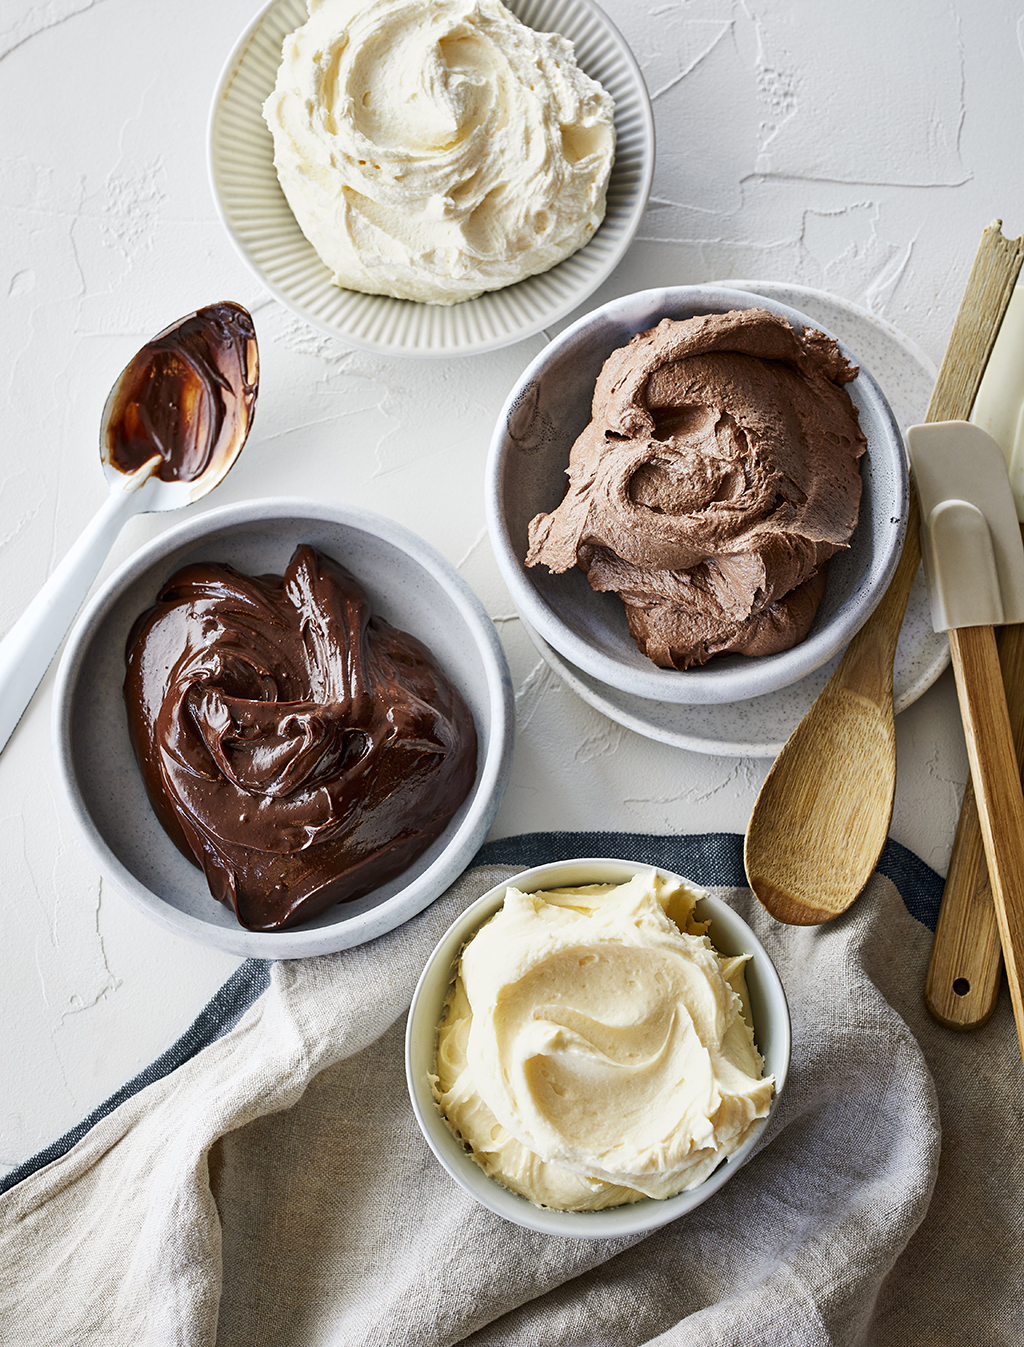
Everyone’s favourite part is always the icing! So of course, you need a few fail-proof recipes.
Cream cheese buttercream
150g unsalted butter, softened
300g icing sugar, sifted
125g cream cheese
Vanilla buttercream
250g unsalted butter, softened
450g icing sugar, sifted
1 Tbsp hot water
¼ tsp salt
1 tsp vanilla
Method for all buttercream recipes
Cream your butter and icing sugar together in a stand mixer until it goes light and fluffy, scraping down the mixer bowl a couple of times. Alternatively, use a mixing bowl and electric beater.
Add the remainder of the ingredients and beat until smooth. If you are making your icing in advance, just before you use it, beat the icing again on low speed to knock out any air bubbles that will have formed while it was sitting.
To make the ganache
250g dark chocolate, chopped
200g cream
Place your chocolate into a medium-sized glass bowl or jug. Heat your cream in the microwave or on the stovetop until very hot. Pour over the chocolate and whisk vigorously until the chocolate has melted.
Once the ganache has come together and is nice and shiny, pour it through a sieve and give it another quick whisk. This ensures that your ganache has no lumps of unmelted chocolate, and is nice and shiny. Leave to set for a couple of hours or overnight.
Store at room temperature for up to two days or in the fridge for one week. I like to keep it at room temperature before using it so it’s a spreadable consistency, perfect for icing cakes.

Chocolate shards
We make chocolate shards in the bakery to use as a decoration for lots of our treats. Working with chocolate scares me, maybe because it can be a bit of an unknown.
We find the microwave method achieves reliably shiny, thin chocolate shards that have a nice snap when you break them apart.
Preparation time: 15 minutes (plus about 1 hour for the shards to set)
315g good-quality dark or white chocolate, roughly chopped, or use chocolate chips (we use Callebaut callets)
Method
Line two flat trays with baking paper.
Put 300g of the chocolate into a clean microwave-safe plastic or glass bowl. Set the remaining 15g of chocolate aside.
Microwave in bursts of 20 seconds, stirring well in between bursts so the chocolate doesn’t burn.
Check the temperature of the melted chocolate - we are aiming for 40degC. If it is not up to temperature yet, keep microwaving in 20-second bursts.
Once up to temperature, add the remaining 15g of chocolate to the bowl. Continuously stir the chocolate until it is all melted together.
For dark chocolate, you need to keep stirring until the temperature drops to 31degC. For white chocolate, you need to keep stirring until the temperature drops to 29degC.
When the chocolate reaches the correct temperature, divide it between the two pieces of baking paper. Use a palette knife to spread it out thin, making sure you work quickly to avoid it cooling and setting too soon.
Let the chocolate set until firm on the baking paper, and then snap it into small pieces.
Store in an airtight container at room temperature, out of direct sunlight (the pantry is best), for up to three months.

Brandy snaps
I almost wish I had never made my own brandy snaps, because now I will never be able to eat store-bought ones again.
I use gardening gloves when I’m rolling the brandy snaps so I don’t burn my fingers!
MAKES 10-12
Preparation time: 20 minutes
Bake time: 8–10 minutes
220g sugar
220g usalted butter
120g golden syrup
220g plain flour
20ml lemon juice
½ tsp ground ginger
Method
Preheat the oven to 180degC fan bake. Line three flat trays with baking paper.
Put the sugar, butter and golden syrup in a medium-sized saucepan over medium heat and stir until it starts to bubble.
Remove the saucepan from the heat, and whisk in the sifted flour and ginger. Then whisk in the lemon juice.
Using a small 50mm retractable ice-cream scoop or two dessert spoons, place scoops of brandy snap on to the baking trays, leaving a lot of room between each so they can spread as they will triple in size. Use a palette knife to spread the brandy snap mixture into rectangles.
Bake for 8 minutes. Check to see if they are golden; they may need another 2 minutes.
Remove from the oven and keep them flat. Break up when they are cool.

Salted caramel sauce
Homemade salted caramel trumps all. Be careful with the hot sugar; use the deepest saucepan you have so there’s less chance of it splashing you.
125ml water
325g caster sugar
250ml cream
50g unsalted butter
1 tsp salt
Put the water and caster sugar into a large, heavy saucepan over a high heat. Heat, swirling occasionally, so no sugar crystals form around the edges. If it is starting to look a bit crispy on the sides of the pot, get a wet pastry brush and run it around the edge of the pot to re-dissolve the sugar.
When the sugar has become a golden amber colour, slowly and carefully pour in the cream (otherwise it may splash up) and gently whisk. Be careful of the steam!
Once all the cream has been whisked in, add the butter and salt, then whisk again until all combined.
Store in the fridge for up to two weeks.


