"From re-creating world-renown pizzas to finally being able to make pizza ‘your way’, an outdoor pizza oven can deliver your pizza dreams in your own backyard.
"Home-made pizza any night of the week is now practical."
Schuhrke believes making a pizza should be fun and as there are endless styles of pizza, there is something for everyone.
A former geographer who ditched his office life to make pizzas, Schuhrke became popular on social media channels for his tips on making pizzas at home as well as his innovative recipes.
In his book, Epic Outdoor Pizza Oven Cookbook, he concentrates on styles that perform best in an outdoor pizza oven, starting with Neapolitan-inspired recipes, while introducing new combos in a section on modern artisan pizzas. There is also a section on classic American flavours.
"Pizza is a comfy place to try unfamiliar flavours and sometimes you can discover new favourites."
Outdoor pizza ovens now come in various brands and models — from bare-bones starter ovens to restaurant-grade.
Schuhrke’s essential tool kit includes wooden and metal pizza peels, a wire cooling rack, an oven brush to clean the stone, an infrared thermometer, a bench scraper to divide dough and a restaurant-grade pizza cutter.

"I encourage you to seek out farmers’ markets and local purveyors to take your pizzas to the next level.
"Making your dough from scratch is my number one recommendation for delicious pizza at home with your outdoor pizza oven."
THE BOOK
Epic Outdoor Pizza Oven Cookbook: Masterpiece Recipes for All Kinds of Pizza, by Jonathon Schuhrke, published by Harvard Common Press, RRP$49.99
Pizza ovens
Schuhrke’s tips for selecting an outdoor pizza oven. —
- Size — a larger oven gives you more room to move pizzas around. He recommends one to fit a 41cm pizza with a high clearance above the baking stone.
- Fuel — the key to epic pizza at home. He recommends going with gas as it offers best heat control.
- Style — If you prefer pizza cooked at lower temperatures, then an oven with a door allows the oven to stay hot with less intense flame.
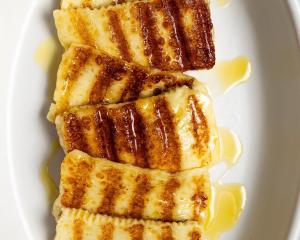
 Spicy meat calzone
Stuffed with a heat-packed filling, this spicy, meaty and cheesy calzone spits hot fire. The spice is layered on with pepper jack cheese, pickled jalapenos and a mix of hot Italian sausage, andouille sausage and smoky bacon. Serve with a spicy ranch dressing or marinara sauce.
Makes 1 large calzone
2 slices bacon, cut into 0.5cm lardons
1 link hot Italian sausage, casing removed
1 link andouille sausage, casing removed
45g low-moisture whole-milk mozzarella cheese, thickly shredded
45g pepper jack cheese, thickly shredded
1 classic American pizza dough ball 250g (below)
1-2 Tbsp pickled jalapenos
145g fresh mozzarella cheese
extra-virgin olive oil
Method
To make the filling
Heat a deep skillet over medium heat and add the bacon. Cook the bacon until the fat has rendered and the pieces are just crispy. Using a slotted spoon, remove the cooked bacon and transfer to a paper towel-lined plate. Drain the bacon grease from the pan and add the sausages. Return the pan to the stove and cook briefly before breaking up any large chunks with a potato masher.
Cook over medium heat until the sausages are browned and fully cooked. Using a slotted spoon, transfer the sausages to a small bowl.
The fully cooked spicy meat mixture can be stored in an airtight container in the refrigerator for three to four days.
To make the calzone
Heat your outdoor pizza oven for 30 minutes until baking stone reaches 230°C-250°C in the centre.
Combine the low-moisture whole-milk mozzarella and pepper jack cheeses in a small bowl and keep chilled.
Once the outdoor pizza oven is fully heated, stretch the pizza dough.
Add half of the shredded cheeses and top with half a ½cup cooked sausage and one to two tablespoons cooked bacon pieces. Top with the pickled jalapenos and the fresh mozzarella cheese, pulling large marble-size chunks off with your hands as you go.
Top with the remaining shredded cheeses.
Fold the dough towards you over the top of the fillings, matching the seams.
Using the back of a pizza cutter, press firmly all along the edge of the calzone, sealing it and creating a hills-and-valley appearance.
Using a pizza cutter, trim about half a centimetre off the edge of the closed calzone, sealing the contents further and creating a clean edge.
Turn the heat setting to the lowest setting and load the calzone with the seam facing towards the heat source as close as possible to the oven mouth.
With the heat setting on low, bake the calzone. Once puffed and brown, turn calzone to bake the opposite side. Look for the dough to puff into a high-domed appearance with a golden brown crust with some spots of char on the top and bottom.
When the calzone is fully baked, carefully remove it from the oven and let rest on a wire rack.
Brush the top of the calzone generously with olive oil.
Let rest for two to three minutes before slicing on a baking paper-lined baking sheet or pizza peel.
 Broccolini and white cheddar pizza
At the farmers’ market, I reach for quick-cooking broccolini over broccoli. The sweet, tender cross of broccoli and gai lan (Chinese broccoli) is suitable for topping pizza without any pre-roasting. The broccolini gets a quick trip through a zippy marinade of lemon, garlic and shallots before topping the garlic cream base. The classic pairing of broccoli and cheddar cheese feels right at home on this pizza. The broccolini will cook down as it bakes on the pizza, so be generous when topping the pizza — you want to get your veges in here.
Makes 1 36cm-41cm pizza
Ingredients
1 bunch broccolini (1cm trimmed from stems), stems diced and florets roughly chopped
3 garlic cloves, divided
1 large shallot, thinly sliced
1 small lemon, zested and juiced
2 Tbsp extra-virgin olive oil
½ tsp kosher salt
1 pinch red pepper flakes (optional)
freshly ground black pepper, to taste
⅓ cup heavy cream
¼ tsp garlic powder
85g low-moisture whole-milk mozzarella cheese, thickly shredded
85g extra-sharp cheddar cheese, thickly shredded
modern artisan or classic American pizza dough ball (below)
Method
Heat your outdoor pizza oven for about 30 minutes until your baking stone reaches 230°C-250°C.
Mix the broccolini with two thinly sliced garlic cloves and shallot. Add the lemon zest, a teaspoon of lemon juice, olive oil, salt, red pepper flakes (optional) and black pepper. Toss well to fully coat the broccolini and set aside.
Add the heavy cream to a well-chilled medium-size bowl. Using a whisk, whip until thickened (it should be able to coat the back of a spoon). Using a microplane, finely grate one garlic clove into the cream and add the garlic powder. Whisk a few times to combine and season to taste with salt and plenty of black pepper. Keep chilled. Combine the mozzarella and extra-sharp cheddar cheeses in a small bowl and keep chilled.
Once the outdoor pizza oven is fully heated, stretch the pizza dough.
Using a large spoon, spread the garlic cream mixture over the dough, leaving room for the crust to rise. Evenly distribute the mozzarella and cheddar cheeses over the cream. Top with a generous amount of the marinated broccolini (it will cook down quite a bit in the oven, so go big!). Extra marinated broccolini can be served as a simple salad or reserved for other pizzas.
By this time the stone should have cooled to 200°C-220°C. Turn heat setting to medium-high and load the pizza. Bake the pizza , rotate it and continue cooking for 1 minute until the crust begins to brown deeply. Reduce temperature as low as possible to finish baking and crisp the bottom. When the pizza is fully baked, carefully remove it and let rest on a wire rack for about 1 minute. Slice on a baking paper- lined sheet or pizza peel. Serve immediately.
Tip: The marinated broccolini also makes for an excellent fire-roasted side dish. Leave the broccolini stalks whole, trimming any tough ends, and marinate as per the recipe. Roast the broccolini in your outdoor pizza oven in a heated cast-iron pan under high heat until tender and charred in some spots, about five to six minutes. Top with freshly shaved parmigiano-reggiano and a squeeze of fresh lemon juice before serving.
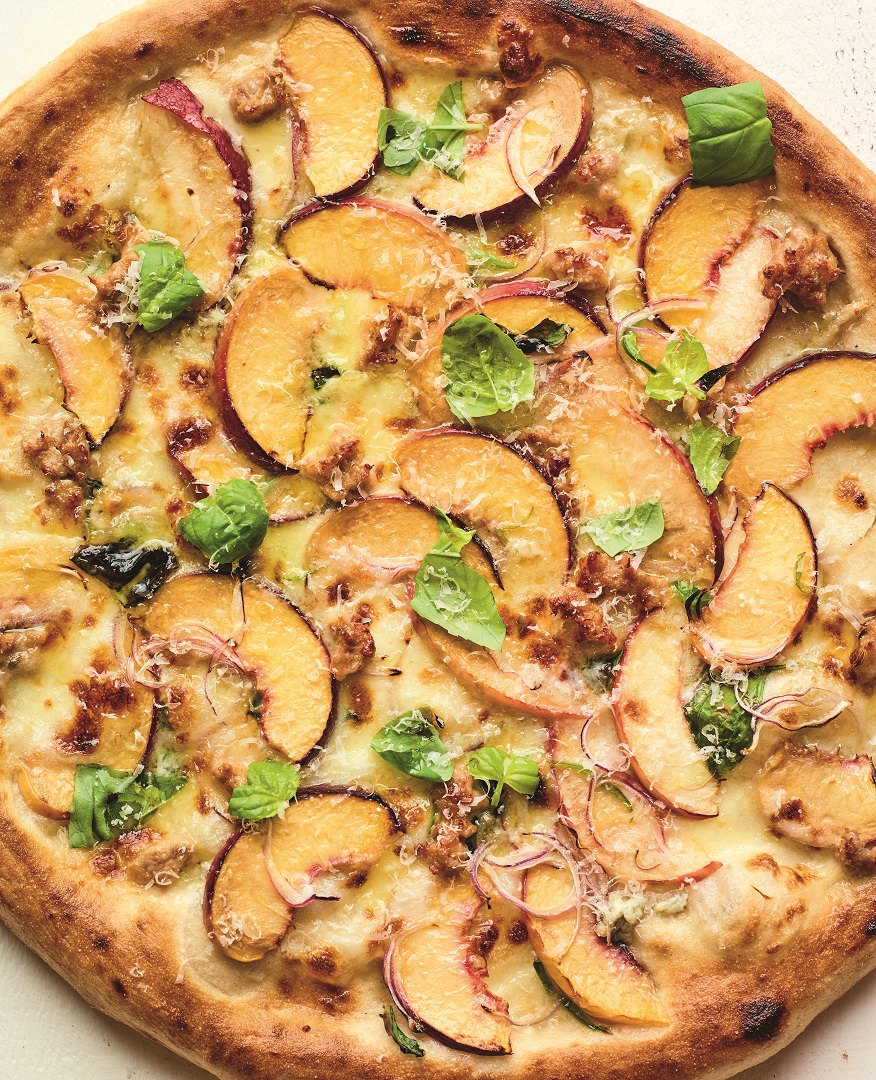 The summer peach
Juicy, sweet, perfectly ripe peaches are always a highlight of summer. Peaches on a pizza make it a summer to remember. This is a stunner with a patchwork of two varieties of peaches and three types of cheese. Don’t get confused by the fruit, this pizza isn’t a dessert. The kick of a green chilli and the savory flavours of Italian sausage keep things balanced on this sweet and spicy pizza.
Makes 1 36cm-41cm pizza
Ingredients
1 modern artisan or classic American pizza dough ball (below)
225g fresh mozzarella cheese
30g gorgonzola cheese, crumbled
1 garlic clove, thinly sliced
1 yellow peach, sliced
1 white peach, sliced
1 small red onion, thinly sliced
1 green chilli, stem, inner membrane, and seeds removed, thinly sliced
1 link mild Italian sausage, casing removed
4 or 5 basil leaves
2 Tbsp grated parmigiano-reggiano cheese
extra-virgin olive oil
Method
Heat your outdoor pizza oven for about 30 minutes until your baking stone reaches 230°C to 250°C.
Once the outdoor pizza oven is fully heated, stretch the pizza dough.
Leaving room for the crust to rise, top the stretched pizza dough with the fresh mozzarella cheese, pulling large marble-size chunks off with your hands as you go. Top with the gorgonzola cheese and garlic. Top with the peaches, alternating between yellow peach and white peach slices for a contrasting appearance, followed by the red onion and green chilli. Finish building the pizza with the sausage, pinching off small marble-size pieces with your hands as you go.
By this time the stone should have cooled to 200°C to 220°C. Turn heat setting to medium-high and load the pizza. Bake the pizza, rotate it and continue cooking for 1 minute until crust begins to brown. Turn down temperature as low as possible to finish baking and crisp the bottom. Watch for the pieces of fresh mozzarella to melt and the peaches to caramelise in some spots. The crust should be golden brown and charred in some spots. When the pizza is fully baked, carefully remove it and let rest on a wire rack for about 1 minute.
Top the pizza with the basil leaves, tearing as you go. Drizzle with a few glugs of olive oil and sprinkle the parmigiano-reggiano cheese over the top of the finished pizza. Slice on a baking paper-lined sheet or pizza peel.
Serve immediately.
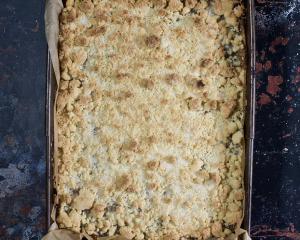
 Modern artisan pizza dough
My go-to pizza dough for outdoor pizza ovens. The dough bakes beautifully with enticing leopard spotting when baked at higher heat and golden brown caramelisation at lower temperatures. It has the look and flavour of what you encounter at the best modern (and sometimes fancy) pizzerias. The higher hydration makes for an airy and light crumb, but the dough is sturdy enough to hold up even when topped with the most intense toppings. It’s a versatile pizza dough suitable for any pizza recipe in this book. Adding a small amount of whole-wheat flour adds a big boost of flavour without compromising the texture or workability of the dough. The dough is best after 48 hours of cold fermentation, but can also be used the day of mixing. I keep it simple, making the pizza dough as a "direct dough" in one mix without the need for a mixer or any special tools.
Dough
for 3 36cm-41cm pizzas, 4 30cm-36cm pizzas or 5 25cm-30cm pizzas or calzones
Ingredients
700g all-purpose flour (bread flour)
25g whole-wheat flour
450g filtered water, warm (about 38°C)
20g kosher salt
2g instant dry yeast
10g extra-virgin olive oil
Method
Add the all-purpose flour and whole-wheat flour to a large mixing bowl. Using a wire whisk, mix thoroughly for about 1 minute and set aside.
Pour the filtered water into another large mixing bowl, add the salt, and stir to dissolve completely. Sprinkle the dry yeast over the surface of the water and let the yeast absorb some of the water briefly, about 30 seconds to 1 minute, before stirring to dissolve completely. Add the olive oil and stir to distribute a bit. Add the flour blend.
Using your hands, incorporate the flour into the water by mixing and pinching the flour with your fingers. Work any dry bits of flour into the water, but do not knead the dough at this point.
Cover the dough while you prepare the tray, bowls, or plates for the prepared dough balls by lightly greasing them with olive oil and adding a light shake of all-purpose flour on top.
Turn the dough on to a lightly floured work surface and knead with your hands, folding the dough on to itself. Continue kneading until it’s mostly smooth. If the dough feels extremely sticky and difficult to knead, sprinkle a small amount of flour on the dough and the work surface and fold into the dough.
Using a bench scraper, divide the dough into 3 equal portions for three 36cm-41cm pizzas, dough balls for four 30cm-36cm pizzas, or dough balls for five 25cm to 30cm pizzas. Form each portion into a tight dough ball by folding the edges of the dough into the centre, repeating the process a few times until the top of the ball is smooth. You want to be careful to not tear the dough and destroy the forming gluten strands. Seal the bottom of the dough balls closed by tightly pinching the seam with your fingers.
Place the dough balls seam side down in the prepared dough tray, bowls, or plates. Cover tightly and let ferment at room temperature (about 21°C). If you plan to cold ferment (recommended method) the dough, transfer the dough balls to the refrigerator when you notice the initial signs of fermentation (dough is expanding, small bubbles forming, about 2-3 hours) and let cold ferment for about 24 hours or up to 4 days. I find days 2-3 to be ideal in terms of flavour and workability. Be sure to bring the dough balls to room temperature before using, about 2-3 hours. If you notice the dough starting to overproof (large bubbles forming, rapid expansion of the dough), return the dough to the refrigerator to cool down slightly before returning to room temperature before using.
If using the dough on the same day, let it ferment at room temperature until fully proofed (typically 6-8 hours). The dough should be about double in size and look lively with very small bubbles visible on the surface of the dough. When you push in the dough gently, it should spring back to its original shape.
If temperatures are warm, be careful to not overproof. If you see the signs of over-fermentation (large bubbles), cool the dough in the refrigerator and return to room temperature before using.
Note: Prepared dough balls can be stored covered in the refrigerator for up to four days or frozen for up to three months.